Tuesday, October 9, 2012

Banana Muffins...Banana & Pumpkin Muffins

Fall weather is FINALLY beginning to make an appearance here in so cal. The gloomy weather makes me want to craft, bake, organize, and light my vanilla and apple berry spice candles. ::sigh:: How I love the fall and winter months. No longer do I cringe at the thought of turning on the oven. My house smells like yummy fall candles and freshly baking banana muffins.

Banana eating is a phase in our household. Sometimes the whole bunch is eaten within a few days, other times they sit, and sit, and sit in the fruit basket. I hate tossing them, but alas they must go before the gnats start to populate my kitchen. Usually I have three or four bananas left... just enough to make one loaf of bread. Granted the loaf is easier to make than the muffins, but I feel that the muffins are cooked more thoroughly and I'm not left with a mushy-centered banana loaf. This time I had an entire bunch, 6 bananas, left. It was either bake or toss them, so I opted for a lot of baking today. I'm going to try freezing some of them to see if I can prolong their little muffin lives for a breakfast next week. I'll let you know how that works out.

Since I had so many bananas that were seeing their final day, I have not one, but two recipes to share with you today. I made a looooot of muffins.


The first recipe is for Banana Muffins. This recipe is in the Better Homes and Gardens Cookbook: mentioned in the sidebar of my blog. If you don't have access to this cookbook, here's the recipe:

Makes 1 loaf or 16 muffins.

2 cups all purpose flour
1 1/2 tsp baking powder
1/2 tsp baking soda
1/4 tsp salt
1/4 tsp ground cinnamon
1/8 tsp ground nutmeg
2 eggs, beaten
1 1/2 cups mashed banana (4-5 medium bananas)
1 cup sugar
1/2 cup cooking oil (I use canola.)
1/4 cup chopped walnuts. Optional. (I don't use them because I'm allergic.)

Preheat oven to 350F. Grease a cupcake/muffin tin. Set aside.

In a large bowl combine all dry ingredients (except sugar).
In another bowl combine eggs, sugar, and oil. Mix well. Add bananas.
Combine with dry ingredient mixture. Do NOT over mix. The batter should be lumpy.

Bake for 15-22 minutes or until a toothpick comes out clean.
If you use a loaf pan, bake for about 60+ minutes.
(When I was making the loaf, the top would almost burn before the middle was done cooking. If this happens, place some tin foil, loosely, over the top after about 45 to 60 minutes.)


Recipe 2: Banana Pumpkin Muffins
Here is the original recipe. I made some adjustments after I tasted the batter. Since it's very similar to the Banana Bread Muffins, I used the "seasoning" from that recipe in this one. Here are my ingredients along with the directions from Taste of Home (see link above). Some stuff I substituted or added because I didn't have what it called for.

Makes 16 muffins.

1 stick softened butter (1/2 cup)
1 1/2 cup sugar
3/4 cup mashed bananas (2 medium bananas)
1/2 cup canned pumpkin
1 tsp vanilla
1 3/4 cup all purpose flour
1 1/2 tsp baking powder
3/4 tsp baking soda
1 1/4 tsp cinnamon
1/4 tsp nutmeg
1/4 tsp salt (Originally 1/2 tsp, but if you use salted butter you need to adjust the salt)

In a large bowl, cream butter and sugar. Add eggs and beat well. Mix in bananas, pumpkin, and vanilla. 
In a separate bowl, mix dry ingredients.
Combine wet and dry mixtures.

Bake at 350F for 30-35 minutes or until toothpick comes out clean. Mine took 31 minutes.


Enjoy!

Wednesday, October 3, 2012

Zucchini Muffins... fail.

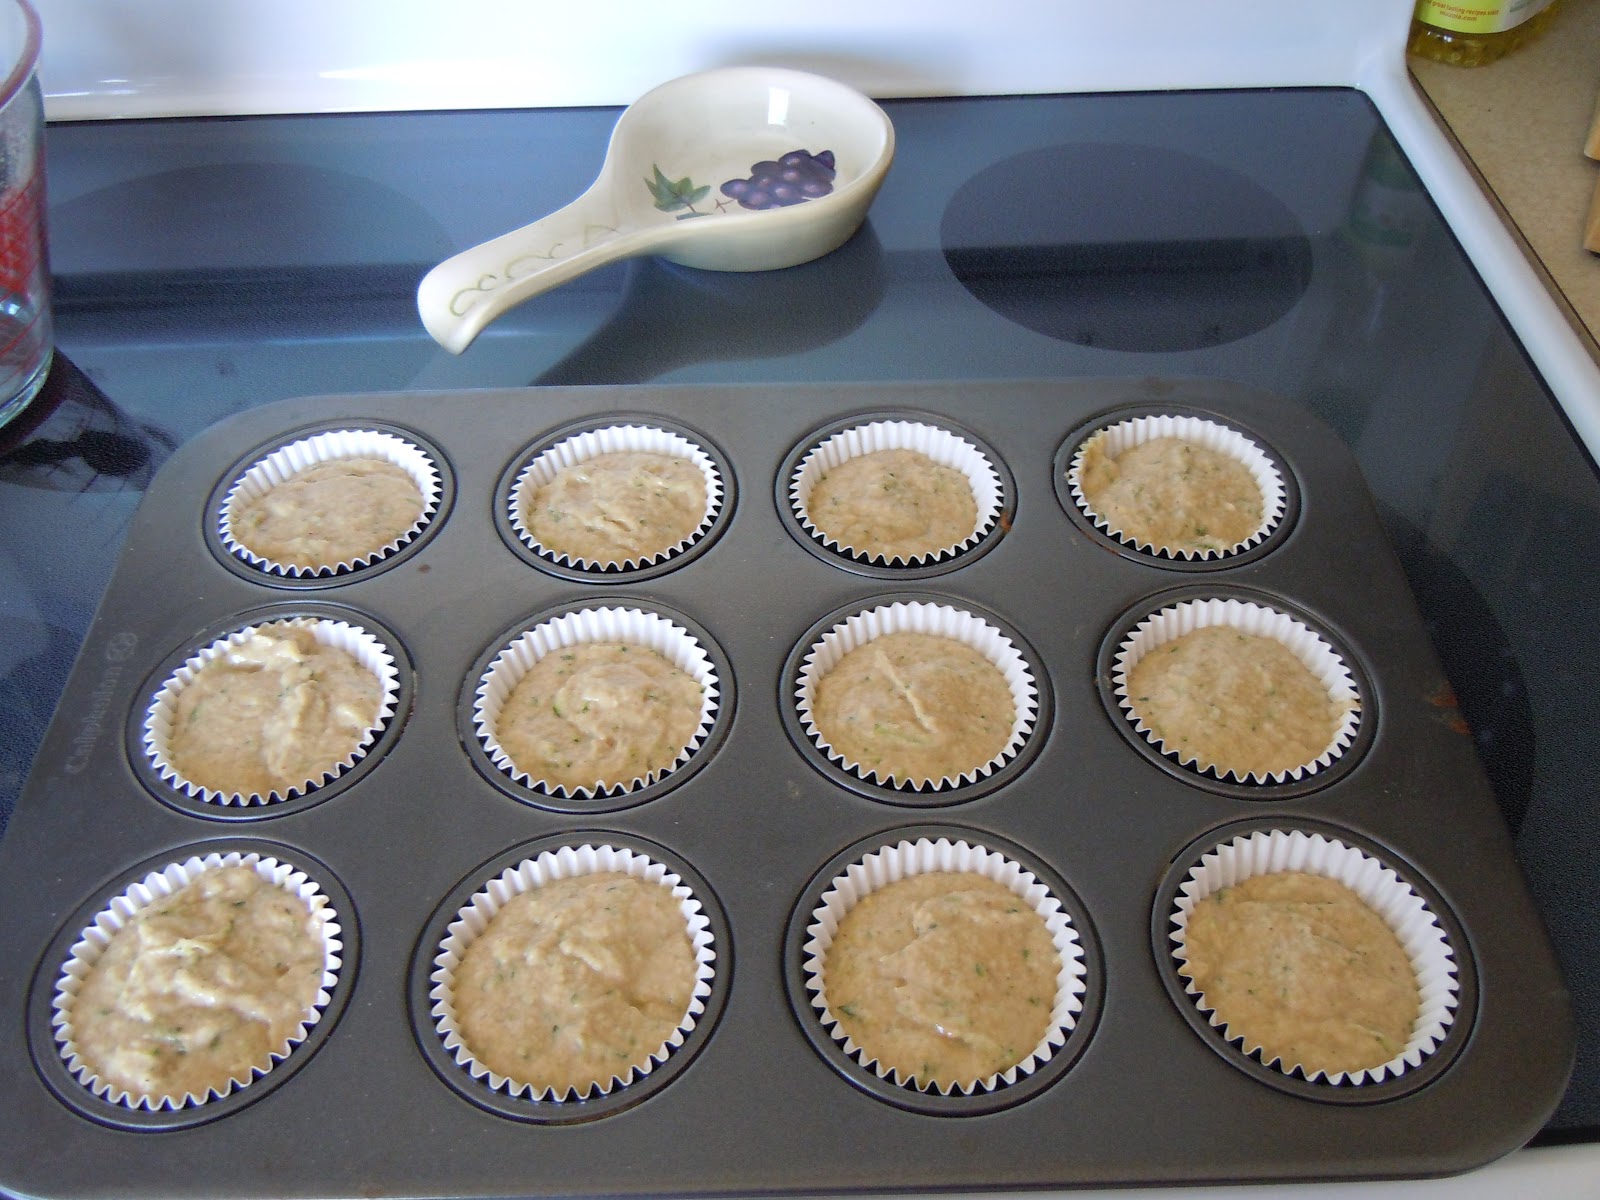
Again, I was browsing recipes online. I have a ton of cookbooks, yet using the internet for recipes is so wonderful. Add in the online hoarding boards, Pinterest, and a girl is sitting on just this side of heaven. The crafts, organization, recipes...I digress. Anywho, since I have already accumulated a hoarders dream worth of recipes on there I decided to start actually making them. This time I saw a recipe for Low Fat Chocolate Chip Zucchini Bread. Given the 'fail' status of my previous bread making adventures, I decided to make muffins instead. Also, I'm not sure how chocolate and zucchini would taste together, so I made some changes to the original recipe. If you are interested in trying chocolate and zucchini, you can find the original recipe here.

*** Keep in mind that I wrote ALL of this BEFORE I tasted the final product.

At first I didn't think I had enough zucchini. Turns out 1 medium sized zucchini produces about 1 1/2 cups shredded zucchini. SUCCESS! I grated it using a cheese grater. About half way through grating, I discovered that the 'small' grate was too small. Then I switched to the larger side and it produced much better shreds. Depending on how much zucchini crunch/taste you want, you can choose which shred works best for you. Here is the difference.


Recipe: 
From the original recipe I linked above, I omitted the chocolate chips, and added the spices and lemon zest. When I tasted the batter from the original one, it seemed a little bland.

Makes 12 Muffins

1 cup all purpose flour
1 cup white whole wheat flour (You can use 2 cups all purpose flour if you don't have wheat.)
1/2 cup unpacked light brown sugar
1 1/8 tsp baking soda
1/8 tsp ginger
1/4 tsp nutmeg
1/4 tsp allspice
1 tsp vanilla
1 large egg
2 tbsp butter, softened
1 cup 'no sugar added' apple sauce
1 1/2 cups loose, shredded zucchini
1 tbsp lemon zest

Preheat oven to 325F. 

Combine flour, baking soda, spices, and salt.
In a separate bowl, beat the egg. Then mix in sugar, vanilla, butter, apple sauce, zucchini, and lemon zest.
Add flour mixture to the wet mixture and stir gently until combined.

Pour mixture into muffin tin. I lined them with foil cupcake liners.


Bake at 325 for about 45 minutes, or until a toothpick comes out clean. Let cool and enjoy!

Final Product: 


They look delicious; however, they are still pretty bland. Earlier, while I was searching zucchini bread recipes, I wondered why they all had so much sugar. Now I understand. I also understand why there were chocolate chips in the original recipe. After I photographed and tasted these moist, slightly lemon flavored, bland muffins. I topped a few of them with chocolate chips while they were still warm. Also, not good. Especially if you add the lemon. 

Conclusion: While these look amazing, I think they are flavorless for the most part. I will not be making these again and I'll be finding a new place for bread recipes. I'm thinking Taste of Home or Betty Crocker or Martha Stewart. 


Banana Pumpkin Bread

I LOVE bananas and pumpkin flavored foods. So, when I saw this recipe I was super excited to try it. Half way through I realized that I didn't have any eggs. I couldn't be too upset because my dear hubby had made eggs and toast for both of us for breakfast. After a quick trip to the market, I returned to finish my bread.

After I sliced the loaf, I thought that it needed to be baked longer. It seemed like the bottom wasn't "bread-like", but still a little doughy. The center slices also seemed a little under cooked. The thing I couldn't understand was that the toothpick came out clean. (Yes, I did insert the tooth pick in a few different spots.) Today, when I was referring to the recipe I had discovered online, I noticed that the picture she took of her loaf looked similar to mine. It looks more dense on the bottom. If I made this again, I would probably make muffins. That way it could cook more thoroughly. For me, it was a little doughy, but the taste was still really yummy. Oh, I would also use less cloves. They were a little strong for me. Therefore, I'm placing this recipe in the 'to try again' section of my recipe box.


Here is the original recipe link.

Ingredients from Skinnytaste

  • Baking spray
  • 3/4 cup unbleached all purpose flour
  • 1/2 cup white whole wheat flour
  • 3/4 tsp baking soda
  • 1/2 tsp salt
  • 1 tsp cinnamon
  • 1/2 tsp ground cloves (I would use 1/4 tsp)
  • 1/2 tsp ground nutmeg
  • 3 very ripe medium bananas, mashed
  • 1/2 cup pureed pumpkin
  • 2 tbsp butter, softened
  • 1/2 cup light brown sugar, unpacked
  • 1 large egg white
  • 1 large egg
  • 1 tsp vanilla extract

Directions from Skinnytaste
Preheat oven to 325°. 

Grease a 9x5 inch loaf pan with baking spray.In a medium bowl, combine flour, baking soda, pumpkin spice and salt with a wire whisk. Set aside.
In a large bowl, cream butter and sugar with an electric mixer. Add egg whites, egg, bananas, pumpkin and vanilla, and beat at medium speed until thick. Scrape down sides of the bowl.Add flour mixture and nuts (if using), then blend at low speed until combined. Do not over mix.
Pour batter into loaf pan and bake on the center rack for 60 minutes, or until a toothpick inserted in the center comes out clean.
Let the pan cool at least 20 minutes, bread should be room temperature before slicing.

Tuesday, September 25, 2012

Frugality vs. Healthy Options

Over snacking and large portion sizes are my downfall when it comes to eating. I also enjoy soda...another downfall. I avoided the inner aisles at the market today, but it seems like the "good stuff" is way more expensive than the "tasty stuff". Why can't the good stuff be tasty? The answer to that question is still a work in progress; however, I'm busily working on recipes that are good AND tasty. "But I don't have time to prepare a healthy meal...", I can hear the excuses already. The good things in life take time, but there are ways to help yourself throughout the week if you are on the go or have a husband that leaves for work before 6:20 every day. Let me say that waking up to make a healthy breakfast and lunch is a daily challenge for me.

So, how can we not spend $$, make a quick healthy meal, and not spend forever preparing it? Yep, you guessed it, the answer to that one is also a work in progress; but, I've come across some things that work for me. Knowing where to purchase good produce for a cheaper price also comes in handy. I find that large chain markets are often almost double the price of a community grocery store. This community store I purchase produce from has a huge variety of produce and herbs for relatively cheap. Look through the weekly ads that are probably tossed without looking at most of the time.

In order to save money (and time in the morning when I'm half asleep and likely to lose a finger if I use a knife), I have prepackaged some snack items such as baby carrots and pb celery. Purchasing the larger bag of baby carrots, a bunch of celery, and a bag of apples is WAY cheaper than buying the prepackaged (with a ton of preservatives) versions of these items. It took about 20-30 minutes to get these three things done. I do prefer to slice the apples in the morning, but there are options for prepackaging those too.

Carrots: Purchase a 16oz bag of baby carrots (99 cents for me today). Place 10 carrots in each snack size bag, along with about 1 tbsp of water to keep them from drying out. This made a week's worth of carrot snacks (about 18 cents/day).

Peanut Butter Celery: Purchase a bunch of celery. Wash and slice the stalks into thirds or quarters. Fill with pb or cream cheese. Place 4-5 pieces in each snack bag. I didn't 'fill' all of the slices I cut because I didn't know how long they would last 'filled' in the fridge. The remainder of the pre-cut pieces, place in a quart size ziplock bag with 1-3 tbsp of water (depending on how much celery you have) to keep it from drying out.


Bagged Salad: Although this is super handy when you're in a hurry, does it really take that long to tear up or cut lettuce? Plus buying the romaine bunch is WAY cheaper than buying the bag of pre-sliced romaine AND it doesn't have that weird processed taste. Today I spent less than $1 on a bunch of romaine and 2 heads of iceburg lettuce. I chopped the romaine and put it in a gallon size ziplock. Ta-da! I give you bagged salad for about 33 cents (without the iceburg). 

Stew meat: Check to see if the larger piece of meat is cheaper. Today, I compared the pre-cut stew meat and the whole piece of meat, both the same size. It turned out that the larger piece was $1/lb less than the pre-cut package. For $1/lb I can cut it myself at home...so I did. 

Freezing: How I wish I had a larger freezer. Freeze the extra sauces that you aren't planning to use right away. Sometimes buying the bagged frozen veggies can be cheaper because they don't spoil so quickly. If you are one for chopping and freezing your own veggies, have at it, but I find that it's better for us if I stock up with the green beans, broccoli, carrots, and corn are on sale for 99 cents a bag. 

Granted the prep work takes a little bit longer, but when it's 5:30 in the morning and I'm trying to put together a lunch that doesn't consist of lays potato chips, pb crackers, and chocolate pudding, I am very happy that I did all of it when I was awake. With all of the snacks already made, all I have to do is put together a sandwich, or a salad, or portion out the dinner left overs, and put in some snacks. This takes 10 minutes or less and my husband isn't eating preservatives all day. 

Monday, September 24, 2012

Pumpkin Cookies with Chocolate

It is time to break out the Pampered Chef stone. ::sigh:: How I've missed you...

Along with the wonderful holiday season comes overly rich foods that can pack on the pounds... and I LOVE to bake. This poses a huge problem. Pun intended. I follow a blog called Skinnytaste. She has a ton of recipes that are lower in fat etc. Today I decided to try making her Pumpkin Spice Cookies. I had to alter the recipe because my keys are in my husband's car, which is miles away with him at work. Needless to say I had to make due with the ingredients that I had on hand because I didn't have buttermilk OR pumpkin pie spice.


Here is the recipe I used (Copied from Skinnytaste and changed with my substitutions.): For the original recipe click > Pumpkin Spice Cookies

  • 4 oz cream cheese, softened
  • 2 tbsp salted butter, softened (Original recipe calls for unsalted. Be sure to adjust salt elsewhere)
  • 3/4 cup brown sugar, packed
  • 1/4 cup sugar
  • 1 egg
  • 1/2 cup pumpkin puree (canned is fine)
  • 1/4 cup 1% buttermilk (Mix 1 cup 2% milk with 1 3/4 tsp cream of tartar. Then measure out 1/4 cup of mixture for recipe)
  • 1/2 tsp vanilla extract
  • 1 3/4 cup all purpose flour
  • 1/2 tsp pumpkin spice 
    • To make pumpkin pie spice mix 2 tsp ginger, 4 tsp cinnamon, 1 tsp allspice, and 1 tsp nutmeg. This makes way more than what you need for this recipe.
  • 1/2 tsp baking soda
  • 1/2 tsp salt
  • 1/4 tsp baking powder

For the chocolate glaze:
  • 1/4 cup confectioners' sugar
  • 1/2 tbsp unsweetened cocoa powder
  • 1/2 tbsp 2% milk
  • 1/8 tsp vanilla extract
  • pinch of salt

Directions: 

Preheat oven to 350°.

In a medium bowl, whip cream cheese, butter and sugars together until light and fluffy. Next add egg; beat well. Stir in pumpkin, buttermilk mixture and vanilla.

Combine flour, spice, baking soda, salt and baking powder; gradually add to pumpkin mixture.

Bake 15 minutes or until golden. 

For the glaze: Whisk confectioners' sugar, cocoa powder, milk, vanilla and salt in a bowl. 

Wednesday, September 19, 2012

Autumn...

Autumn...the beginning of my FAVORITE time of the year. The weather cools down (everywhere except California apparently) and sweaters and scarves and boots are publicly acceptable again. Cooking, baking, and crafts are abundant at the end of the year too! Unfortunately, it's been WAY to hot to bake anything. With fall quickly approaching I couldn't help myself. I went into storage and took out the few autumnal items I have and began the pilgrimage to the craft store to continue building my seasonal arsenal. Since I haven't lived in my own place for very long, it's taking some time to accumulate enough stuff to decorate. This year, I'm going to build my collection when the season ends by purchasing the clearanced fall items.

Blah, blah, blah you're thinking. Where are the crafts, the desserts, the savory, delectable dinners? They are coming! For now I have a few crafts that I've started working on.

Remember the burlap Christmas wreath? It has been updated throughout the year, but I did remember to take a few pictures for the Autumn wreath update. All I did was replace the winter picks with fall picks. I cut apart some of them so I could artistically arrange them around the form. The update was about $4. Not too shabby for a whole new look... AND I LOVE IT!


I have another wreath project in the works, but I'll save that for another blog since I only have the wreath form completed. :/


Aside from the wreath I have also updated my dining room table. Originally the stems I purchased were supposed to make up two vases worth of arrangements, buuuuut it ended up as one.

I suppose that is all for now. I'm browsing my recipes to see if there is anything I'm going to try for dinner. Stay tuned for another update. 


Friday, February 10, 2012

Paper Roll Craft

I actually, successfully, made a craft I found on Pinterest! ::gasp:: I'm just as shocked as you are. After browsing Pinterest and longing to have a house that I can do what I want with, I came back to reality and realized that I better start finding things to better my small, homey apartment. Although pinning that amazing fire pit, fantastic kitchen with tons of storage and a gas stove, innovative large house additions, and that oh so cute nursery (no, so don't bother asking). I decided to re-visit the boards on which I had compiled things I previously "liked". I began collecting toilet paper rolls right after I found this craft and have since been battling the bag in the hall closet. The one hundredth time it fell out of the closet must have been today. Since it was a wonderfully warm California day, I decided to sit on my un-pinterested balcony and get the craft crafted.

Here is the original.

Here is what I did and what you will need:
18 toilet paper rolls
Elmer's Glue-All Multi-Purpose Glue
Scissors
Black Spray Paint
Wax paper

1. Mark the rolls at 1 inch intervals. Luckily, my rolls were exactly 4 inches long. (Except the one I took a picture of.)

2. Fold (squish) the roll, preferably where you made the marks.

3. Cut along your marks.

4. Once you have all of the pieces cut, lay out wax paper. If you do it on regular paper, the glue will stick and then you have to cut your project away from the paper. Then lay out your design.

5. Glue where the pieces are touching. You may want to use clothes pins to hold the pieces together after putting them together. I didn't do this, but they seemed to stay just fine.

6. Wait 30 minutes to an hour, depending on what glue you used. Make sure you wait for the glue to dry before picking it up. Lay new wax paper before spray painting. (I used the same paper and didn't wait for the glue to completely finish drying and now I have to trim painted glue chunks from my piece.)

7. Spray paint, in a well ventilated area! Be sure to spray both sides. You will need more than 1 coat. 


8. Ta-da! I used a total of 72 pieces. It is almost 3 feet by 1 foot.


Since I'm not completely sure where I wanted to hang it, I had my hubby hold it up so you could see the finished piece clearly. 

What I learned: 
Next time I will do this on a table instead of the floor. My legs are killing me! 
Matte spray paint worked as a base coat, but I will be adding a black glossy coat. 
Toilet paper rolls have a swirl mark similar to how a package of crescent rolls opens. Try not to use those pieces since they do not have a smooth finish. 

Until the next craft...